
Last month, I had the pleasure of giving a virtual presentation at work about greener gardening, as part of our Green Team’s new How-To Series on topics about sustainability. Originally, the ask was to talk about raised bed gardening — I started there but soon found myself talking about other things I learned this past year from my “Pandemic Garden”. Here is a modified transcript of what I shared:
Hello, everyone. My name is Frederika Villacarlos. I’m a Marketing Program Manager, based in Concord, California – in US Plant Hardiness Zone 9b.
Outside of work, what lights me up are my family, running ultramarathons, volunteering at Mount Diablo State Park in the East Bay, and most recently, learning about sustainable and regenerative gardening.
My gardening journey
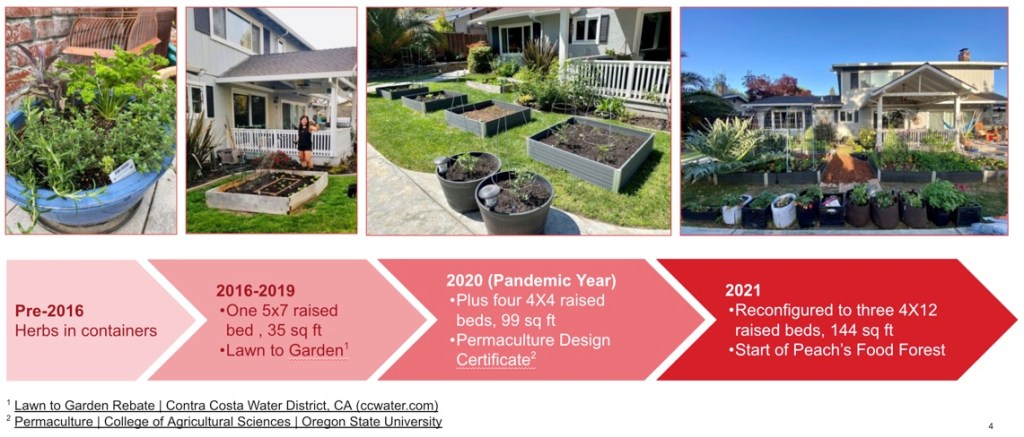
We moved into our home in the East Bay in 2013. The property is a little less than 1/3 of an acre. But there is a lot of concrete in the backyard, so I only have about a tenth of an acre in which to plant. My first attempts at gardening consisted of planting herbs in containers.
In 2016, given the reccurence of droughts in California, I took advantage of a Lawn to Garden rebate program sponsored by the Contra Costa Water District to replace our front lawn with drought-tolerant plants, mostly California natives. In the backyard, I started my first raised garden bed.
When we sheltered in place last spring, I realized we needed to be more resilient and learn how to grow our own food. We added four 4×4 raised beds and tried to grow vegetables in the spring and fall. I relied on YouTube videos, blogs, articles, and gardening webinars which were prolific during the pandemic. Eventually, I heard about Permaculture from my good friend Sienna, and decided to enroll in a virtual Permaculture Design Course offered by the Oregon State University in October 2020. Simply put, permaculture is a design approach where you come up with sustainable design solutions to ecological and social problems that are in harmony with nature.
This year, I began implementing a 5-year plan to transform my backyard into a food forest, with the first step being to reconfigure my existing raised beds to maximize food-growing potential and yield.
I’m less of a subject matter expert, and more of a student of gardening, and I’m really excited to share what I’ve learned so far.
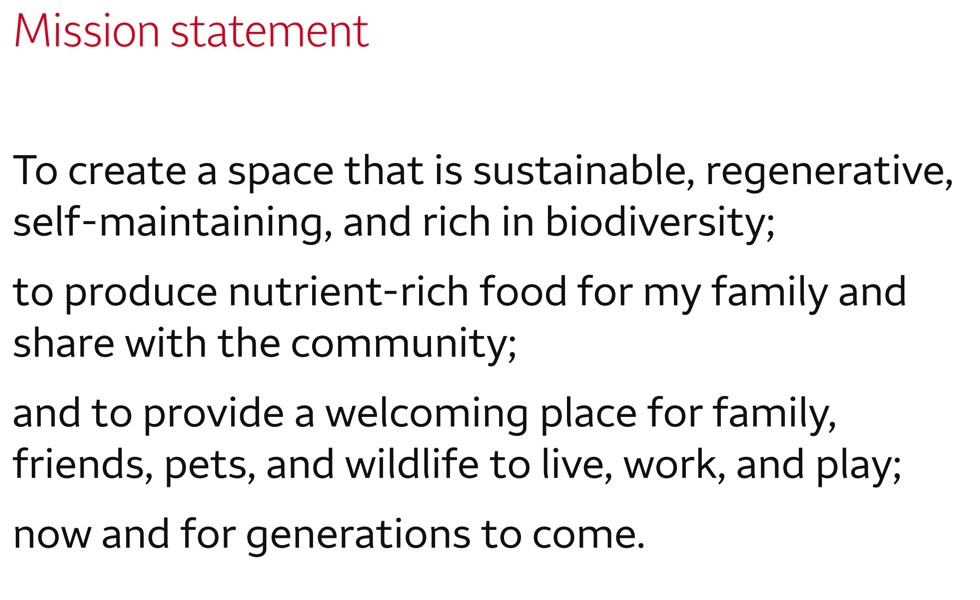
Mission statement
During my PDC class, I developed the following mission statement, my North Star so to speak, and that is:
Why raised beds?
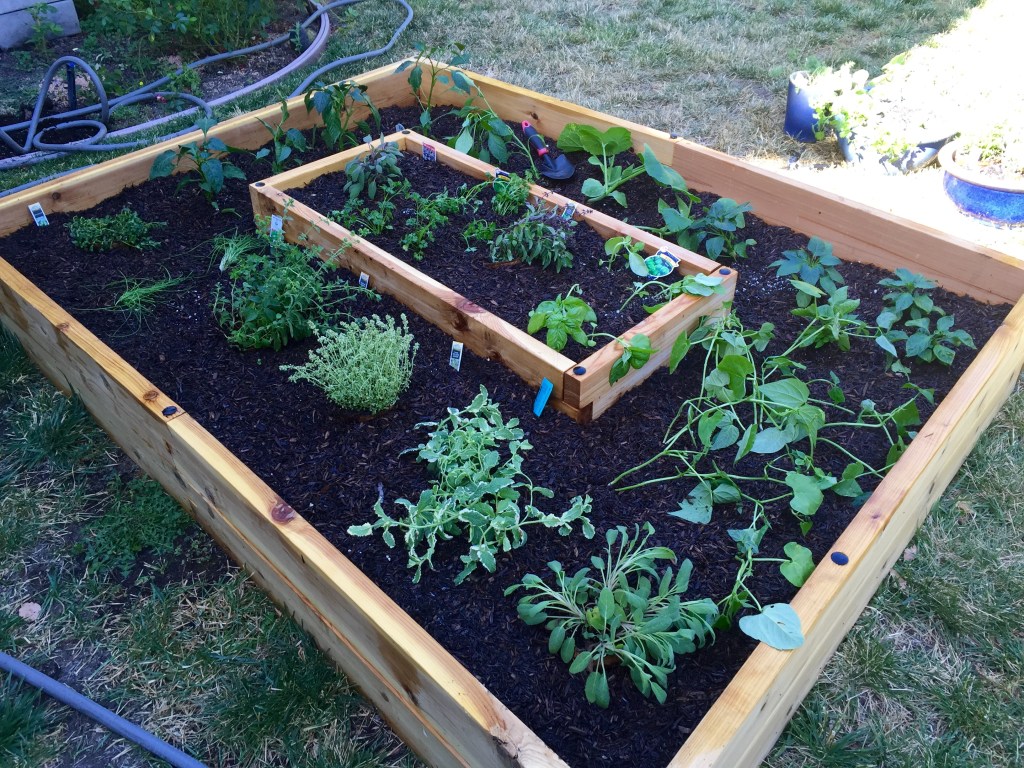
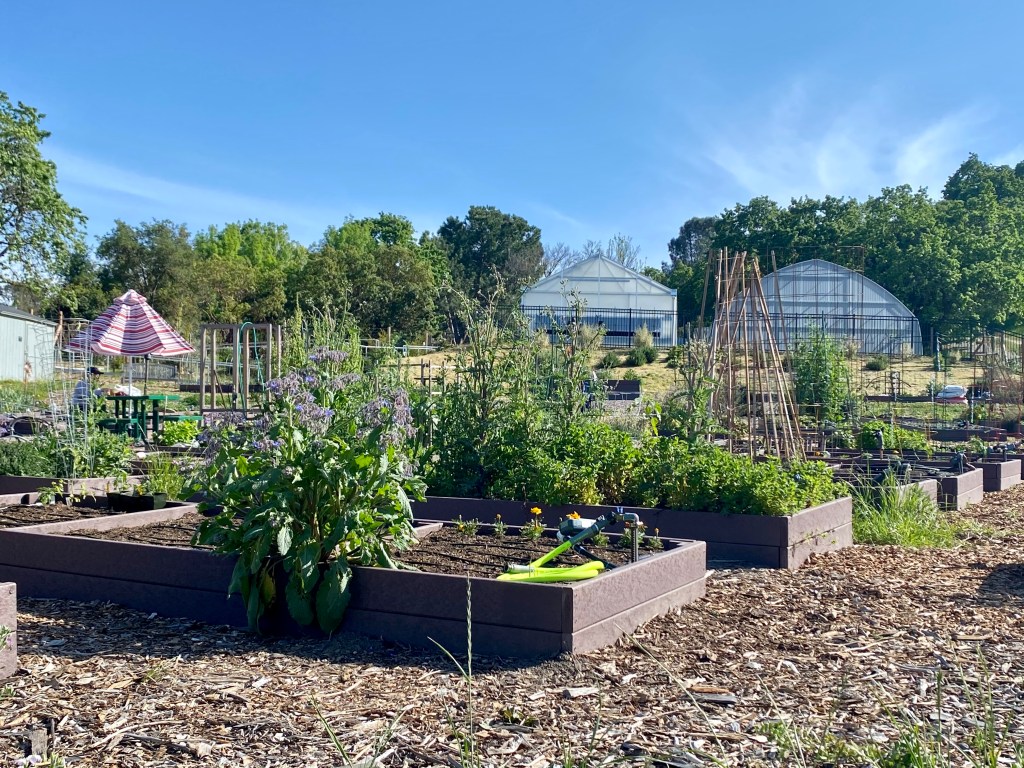
Probably the easiest way to get started with growing your own food is to plant vegetables in a raised garden bed. It can be almost any shape or size based on the space and surface that is available, and you can choose from a variety of materials.
The main benefit of a raised garden bed is it gives you maximum control over soil health. You can build a healthy ecosystem consisting of topsoil and compost, and avoid contaminated soil.
Another benefit is better accessibility. Raised beds put your plants at eye level for better observation, and means less bending and crouching.
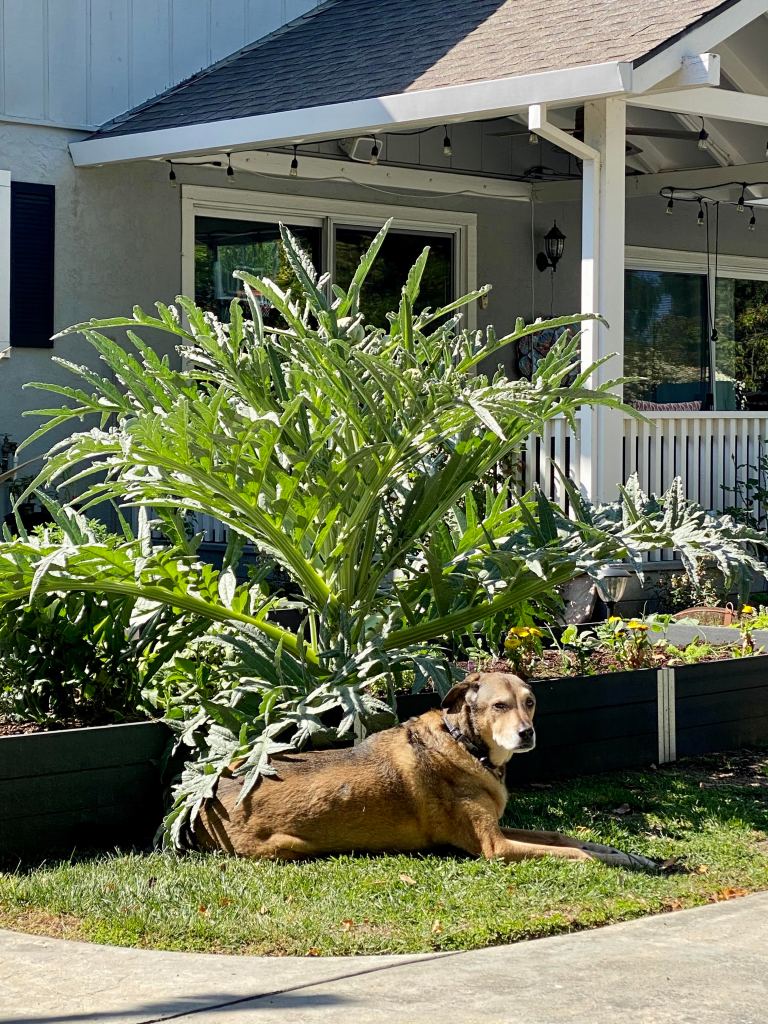
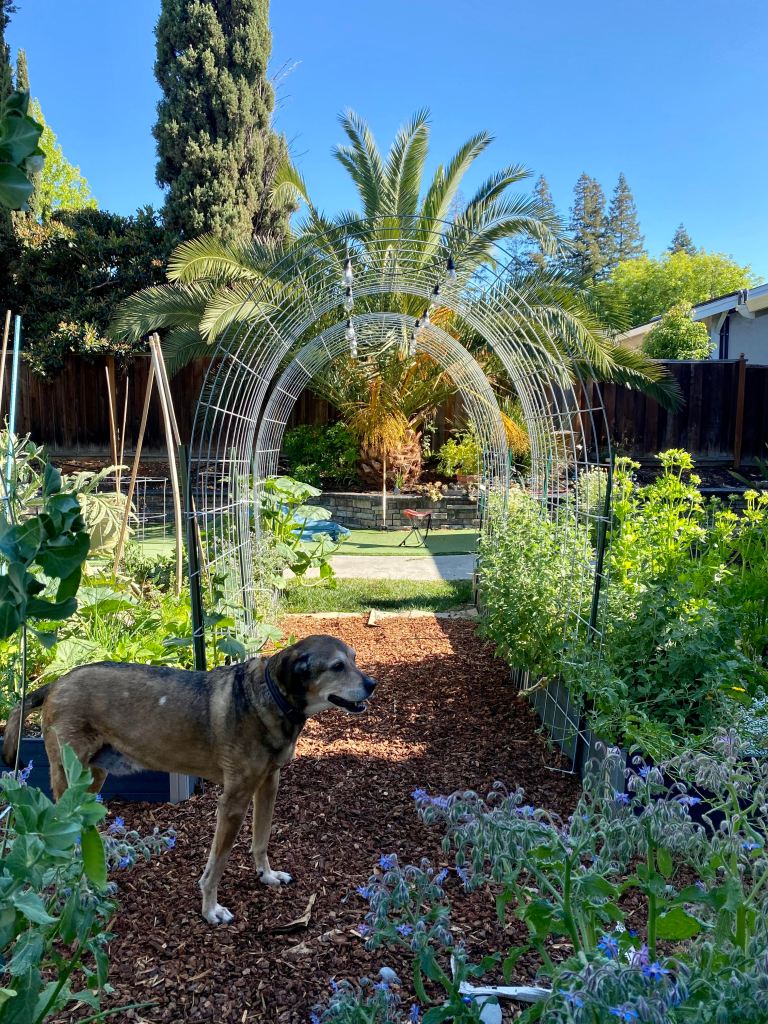
Raised beds allow better drainage, helps keep weeds and critters out (as you can see, your pet dog can help too!), and extends the planting season because the soil warms up faster; and you can utilize season extenders like hoop houses or low tunnels.

Building raised beds
Here are a few important things to consider when building raised beds:
- You’ll need full sun which means 6 hours or more of sunlight a day.
- You’d want a flat surface to prevent water runoff. If you are on a slope, you can make use of terraces.
- Other environmental factors to consider include flooding; you want your raised bed to be well-draining.
- In permaculture terms, raised beds would be located in Zone 1, that is, the area closest to your home, so you can visit it often (in my case, 1-2x a day).
- You need easy access to water, whether you are watering using a can or a hose, or better yet, a drip irrigation system.
- And if space is limited, consider container gardening or even getting a plot in a community garden.
As mentioned earlier, you can build a raised bed using a variety of materials, the most common ones being treated or untreated wood. But you can also build it out of galvanized metal, concrete blocks, bricks, stone, synthetic materials, upcycled materials, or even just mounded up soil.
It can be as long as you want, but try to keep it no more than 4 feet wide, so you can reach into the middle without pressing or compacting the soil.
Raised beds should be high enough to give roots enough room to grow outward and downward. The recommendation is to have a minimum of 6” of good soil. A good target is 12”.
You can build your raised bed on top of concrete surfaces, or like me, on top of grass. If you do, I recommend sheet mulching to kill the existing grass and prevent it from growing through the raised bed.
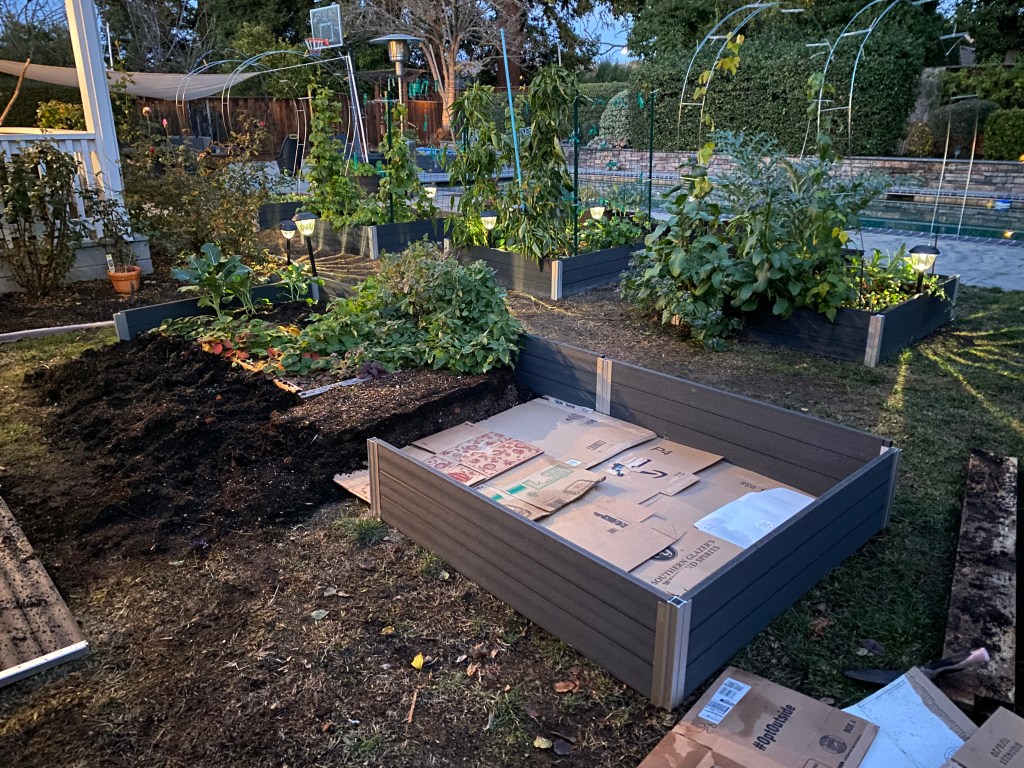
If you have issues with burrowing critters like gophers and moles, you may want to add a metal mesh screen to the bottom of your raised bed.
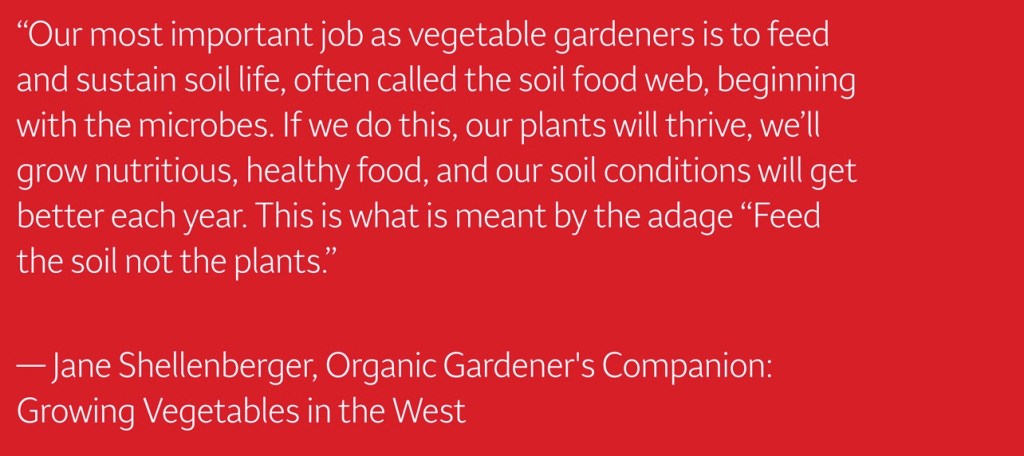
Feed and sustain soil life
I LOVE this quote by Jane Shellenberger, author of Organic Gardener’s Companion: Growing Vegetables in the West.
Healthy soil is key
Soil contains an entire universe of life that helps prevent erosion, increases water infiltration rates, and provides plants with key nutrients. When plants and animals die, they are broken down by organisms — insects, fungi, bacteria, and microbes — into organic matter in the soil that then releases nutrients back to fuel the growth of plants.
That’s why it’s important to abstain from using harmful chemicals and fertilizers, or to disturb soil. This is the principle behind no-till or no-dig gardening. Rather than using tools to routinely “turn over” soil, just leave it alone. You can even leave the roots of spent plants in place.
Healthy soil is well-aerated, well-drained, and full of organic matter.
When starting a raised bed, fill at least the top 6” with good planting mix. For deeper raised beds, you can fill the bottom with organic matter like logs, branches, leaves that can decompose over time. For existing raised beds, replenish each season by adding compost and organic matter.
Additional ways to improve your soil health include:
- Adding compost
- Using mulch to reduce erosion, retain moisture and nutrients, and prevent weeds
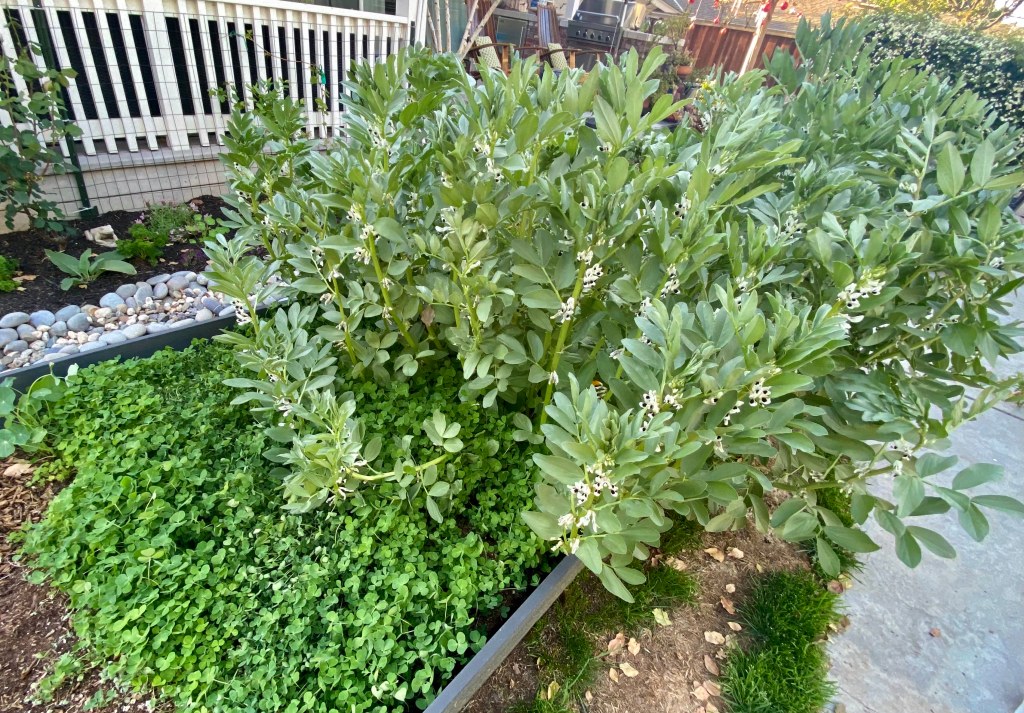
- Cover crops or green manures is a form of living mulch (an example would be crimson clover, seen on the left of the first image). On the right are fava beans, a leguminous cover crop that is a nitrogen fixer, which means they pull nitrogen from the atmosphere and sink it into the soil.
- Using chop-and-drop method, in which you literally chop up the plant material and leave it on the ground, especially for nutrient accumulators like comfrey and yarrow.
One more word about soil. There’s a documentary on Netflix called Kiss The Ground. It talks about regenerative agriculture and carbon sequestration, and how soil can be a solution to climate change. I highly recommend it.
U.S. Hardiness Zones
Before we begin planting, let’s talk about hardiness zones.
Hardiness zones are based on the average annual minimum temperature, divided into 10-degree Fahrenheit zones. It’s the standard by which gardeners and growers can determine which plants are most likely to thrive in a location. It goes from Zone 1a in Alaska to Zone 13b in Puerto Rico.
As I mentioned in my introduction earlier, Concord, California is in Zone 9b where the average annual minimum temperature ranges between 25-30 degrees Fahrenheit. To find out your zone, visit the USDA Plant Hardiness Zone website and enter your zip code.
Frost dates
In order to determine the appropriate timing for planting crops, we also need to be mindful of frost dates, which is the average date of the last light freeze in spring or the first light freeze in fall.
And why is this important? Because tender plants are killed in light freeze, which is between 29 and 32 degrees Fahrenheit. Keep in mind, these are estimates. There is a 30% probability of a frost occurring after the spring frost date or before the fall frost date. To find out your estimated first and last frost dates: First and Last Frost Dates by Location | The Old Farmer’s Almanac.
Planting in spring
Another great resource is the Old Farmer’s Almanac website. Simply enter your zip code, and it will give you the dates for when to start seeds indoors, when to plant seedlings or transplants, and when to start seeds outdoors for many common crops. Transplanting or starting seeds outdoors generally has to be timed after the last frost. Here is an illustration for Zone 9b.
| Crop | Start Seeds Indoors | Plant Seedlings or Transplants | Start Seeds Outdoors |
| Bell Peppers | Dec 21-Jan 4 | Mar 8-22 | N/A |
| Broccoli | Jan 4-18 | Feb 1-22 | N/A |
| Carrots | N/A | N/A | Jan 25-Feb 8 |
| Cucumbers | Feb 1- 8 | Mar 15-29 | N/A |
| Eggplants | Dec 21-Jan 4 | Mar 15-29 | N/A |
| Green Beans | N/A | N/A | Mar 8-29 |
| Lettuce | Jan 18-Feb 1 | Feb 15-Mar 15 | N/A |
| Tomatoes | Jan 4-18 | Mar 8-29 | N/A |
| Watermelons | Feb 1- 8 | Mar 15-29 | N/A |
| Zucchini | Feb 1-15 | Mar 15-29 | N/A |
Planting in fall
Similarly, you can find out when to plant different crops in the fall. Typically, seeds are planted indoors in late summer. Transplants and seeds are planted outdoors in the fall before the first frost.
| Crop | Start Seeds Indoors | Plant Seedlings or Transplants | Start Seeds Outdoors |
| Bell Peppers | Jun 29 | Aug 24 | N/A |
| Broccoli | Aug 31 | Sep 28 | N/A |
| Carrots | N/A | N/A | Oct 23 |
| Cucumbers | N/A | N/A | Sep 8 |
| Eggplants | Jun 29 | Aug 24 | N/A |
| Green Beans | N/A | N/A | Sep 8 |
| Lettuce | N/A | N/A | Nov 2 |
| Tomatoes | Jul 4 | Aug 29 | N/A |
| Watermelons | N/A | N/A | Aug 14 |
| Zucchini | N/A | N/A | Sep 13 |
Growing annuals and perennials
I think there is a place for both annuals and perennials in every garden. What’s the difference?
Annuals
- Live for one season – sprout, flower, seed, and die in one year
- Bloom all season long; often bright and showy
- Replanted each year
- May be self-seeding (biennial, last two years)
- Consider succession planting
| Beans Beets Broccoli Cabbage Cauliflower Carrots | Cucumber Eggplant Lettuce Onions Peas | Peppers Spinach Squash Tomatoes Zucchini |
Perennials
- Live for three or more growing seasons
- Grow back each year from roots that go dormant in winter
- Generally have shorter blooming periods than annuals
- Root systems improve soil structure; access nutrients and water deep in soil; acts as cover crop
- Requires less care
| Asparagus Capers Chayote Chinese Artichokes Egyptian Walking Onions French Sorrel | Fruit trees Garlic Globe Artichokes Horseradish Jerusalem Artichokes Kale | Lovage Radicchio Rhubarb Watercress Wild Leeks |
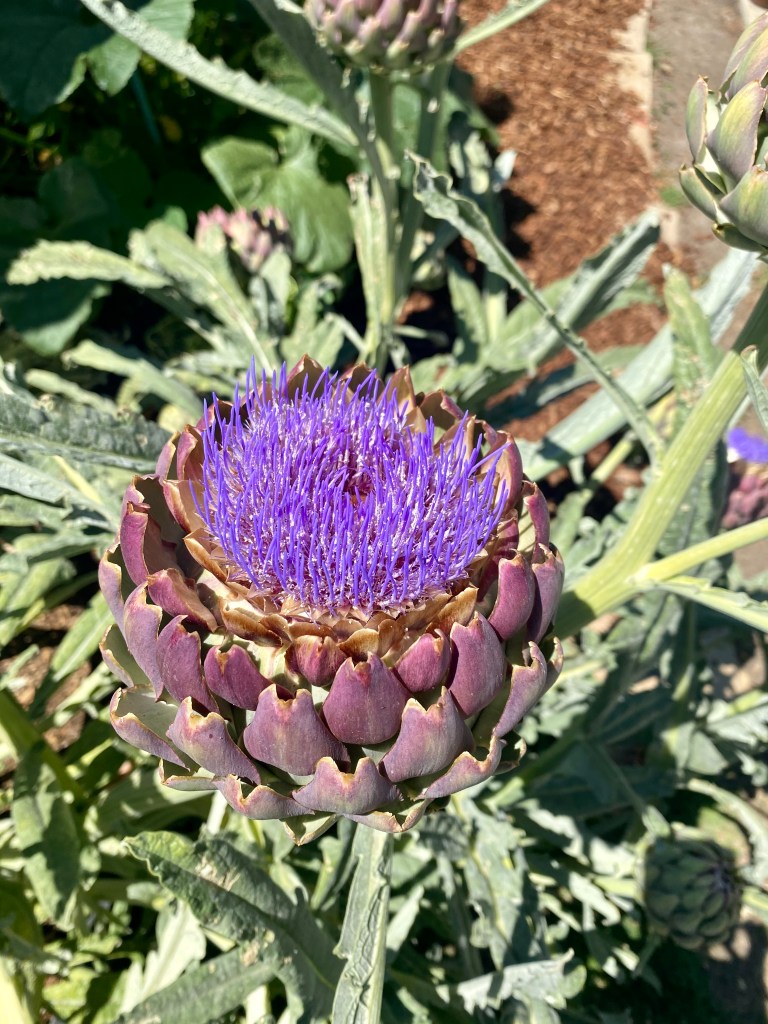
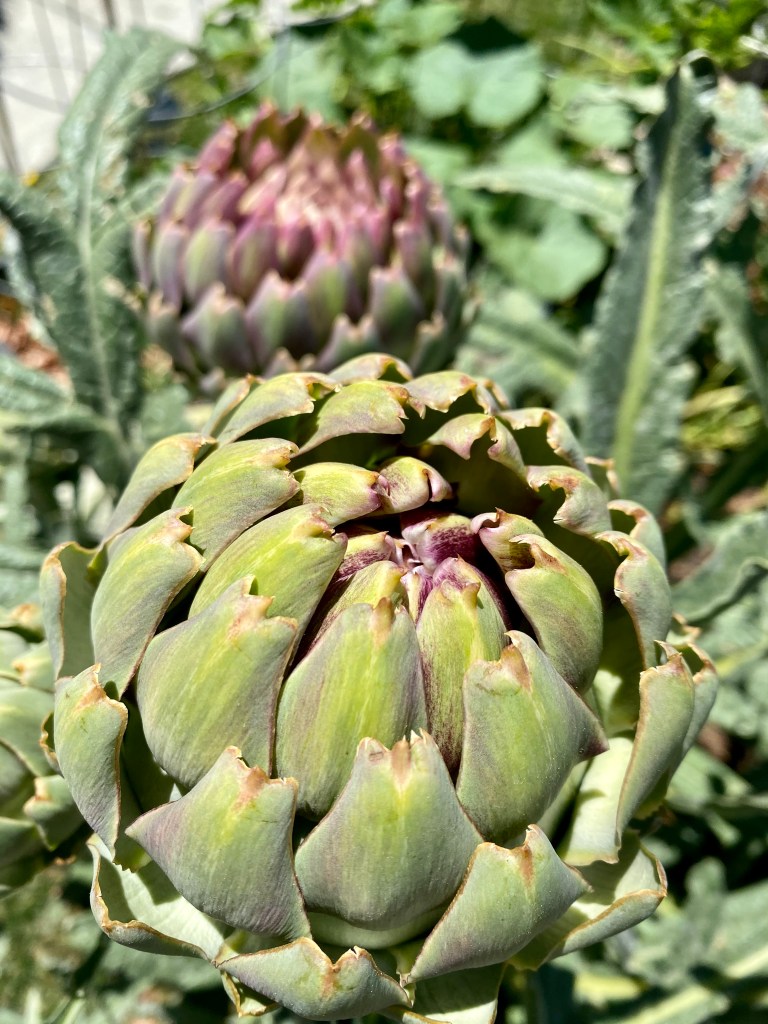
I didn’t know it at the time, but last year, I planted an artichoke in my raised bed, not realizing how big it would grow. It came back with a vengeance this year, and that’s how I learned that it’s a perennial.
Companion planting
Let’s say you’ve decided to plant some tomatoes and beans — many of you probably have them in the ground now! Let’s talk about companion planting.
Companion planting is the practice of growing different crops together for a number of reasons, but ultimately to increase crop productivity.
Companion planting is a form of polyculture, in which more than one species is grown at the same time and place, imitating the diversity of natural ecosystems.
This table shows which crops are good to plant with tomatoes and beans, and which ones to avoid.
| Tomatoes | Beans | ||
| Best | Worst | Best | Worst |
| Basil and other herbs Carrots Cucumbers Squash | Cole crops Corn Potatoes | Broccoli Cabbage Carrots Cauliflower Corn Cucumbers Eggplant Garden peas Potatoes Radishes Squash Strawberries Tomatoes | Beets Members of the Onion family (onions, garlic, leeks, shallots, scallions, chives) Peppers |
Companion planting: flowers
Aside from bringing color and beauty to any garden, planting flowers alongside vegetables can also bring tremendous benefits.
- Attract beneficial insects
- Confuse and deter pests
- Trap crops
- Edible
- Medicinal benefits
- Cut flowers
- Living mulch
- Suppress weeds
- Nutrient accumulator
- Aeration
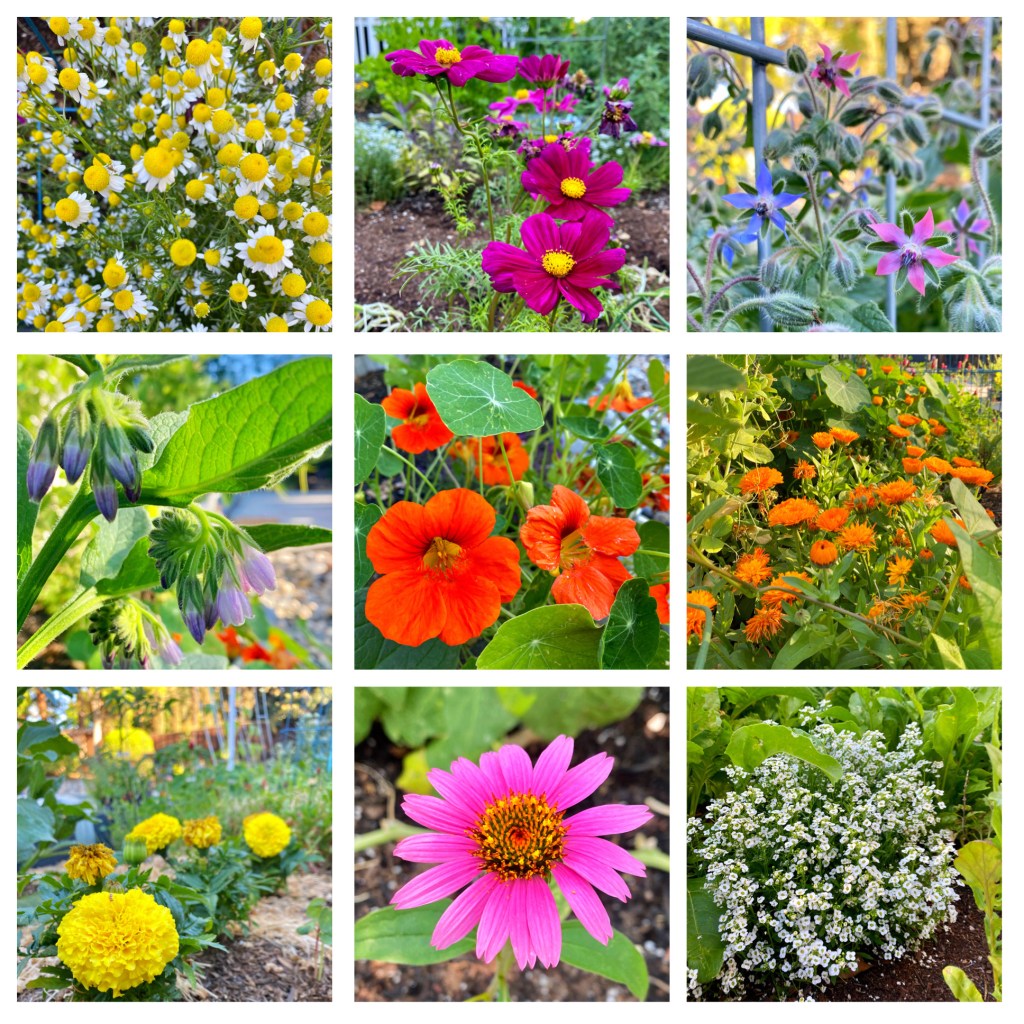
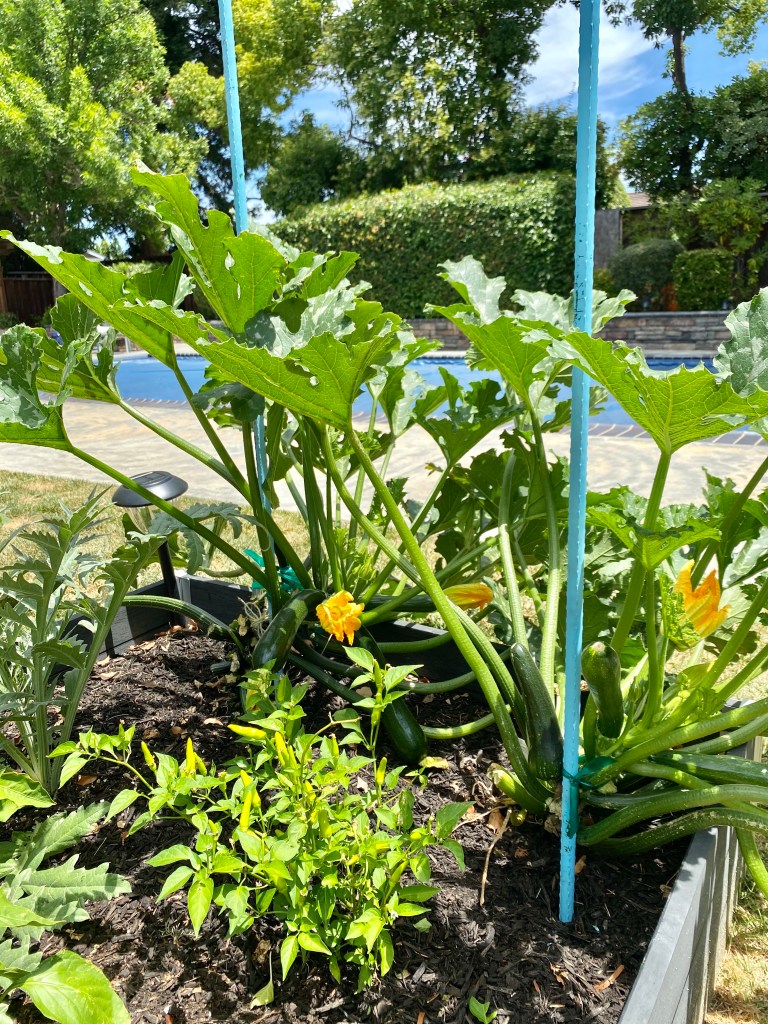
For example, borage attracts pollinators and repels hornworms, so I plant them next to tomatoes.
Nasturtiums are edible, act as living mulch, and serve as a trap crop for aphids.
Chamomile, Echinacea, and Calendula all have medicinal and herbal benefits.
Comfrey attracts beneficial insects, is a nutrient accumulator, and has long roots that help aerate the soil.
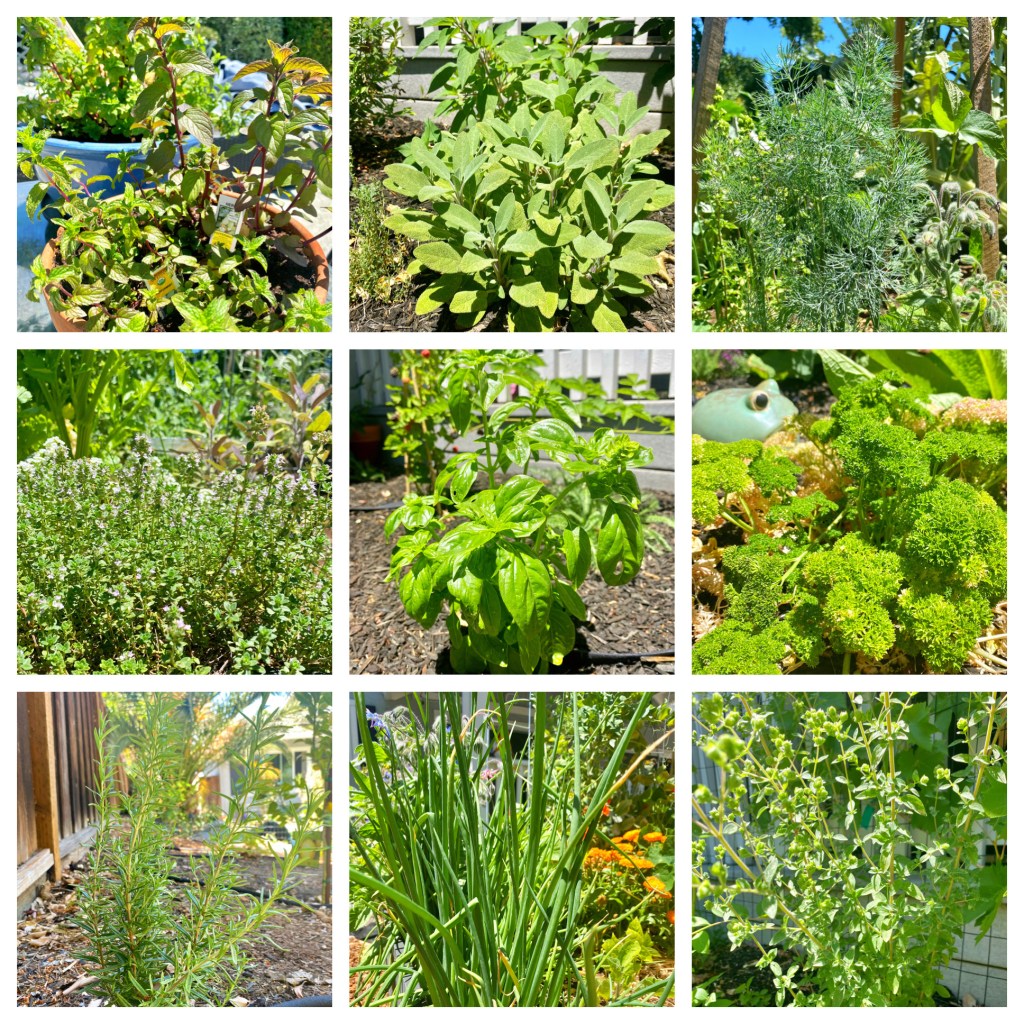
Companion planting: herbs
I LOVE the smell of herbs! Herbs can also be excellent companion plants to common crops. Not only are they great for adding flavor to dishes, they also help repel insects and pests, making them a natural and organic alternative to the use of pesticides. And most of them are perennials, so they’ll last for many seasons.
| Herb | Repels pests | Plant with |
| Mint | White cabbage moth, aphids, flea beetles | Tomatoes, brassicas, and peas |
| Sage | Cabbage moth, carrot fly | Brassicas, carrots, lettuce, beans |
| Dill | Trap crop for tomato hornworms, aphids | Tomatoes, peppers, eggplants, cabbages, brassicas |
| Thyme | Cabbageworm, whiteflies, cabbage maggots | Brassicas, strawberries |
| Basil | Whiteflies, mosquitoes, spider mites, aphids | Tomatoes, peppers, purslane, lettuce |
| Parsley | Asparagus beetles/. Attracts beneficial insects like ladybugs | Asparagus, carrots, chives, and tomatoes |
| Rosemary | Cabbage moth, bean beetles, Japanese beetles, carrot fly | Brassicas, collards, beans, garlic, and carrots |
| Chives | Aphids, beetles, cabbageworms, slugs, carrot flies | Carrots, tomatoes, sunflowers |
| Oregano | Aphids | Peppers, eggplants, squash, beans, brassicas, strawberries |
Here’s a word of caution about mint though. It spreads, so watch for overgrowth, or plant them in containers so they don’t overrun your raised beds.
Water wisely
For those of us facing another drought in California this year, watering plants is a major concern. Here are some tips on how we can water wisely.
- First and foremost, build the health of your soil. As we already mentioned, healthy soil retains and releases water when needed.
- Mulch, at least 2-3” worth. You can use leaves, straw, bark, burlap bags – choose organic materials that can break down over time.
- Water deeply but infrequently to train roots to look for water further in the soil.
- Best time to water is early in the morning. Alternatively, you can water in the early evening, but take care not to get the foliage wet to avoid diseases.
- Drip irrigation is the most efficient way to water (it cuts down on water runoff), and prevents disease by watering the soil and not the foliage.
Not as appropriate for raised beds, but applicable for landscapes in general are the following:
- Store water in the soil. In permaculture, there’s a saying – you want to “slow it, spread it, sink it”. Consider building swales and berms, rain gardens, and dry creek beds. Speaking of which, I want to give a shout out to my friend Angie F, who offered me bags of river rocks from her backyard which I then recycled into a dry creek bed in my backyard.
- Store water on the surface through rainwater harvesting systems, and laundry-to-landscape greywater systems.

Vertical gardening
As your garden blooms and grows, take care to observe, prune, and support your crops.
Vertical gardening through the use of trellises and other support structures allows you to grow more in a smaller footprint. It lifts fruits and vegetables off the ground, reducing the risk of disease. It allows more sunlight and easy access for pollinators. And it enables better airflow to help prevent fungal disease.
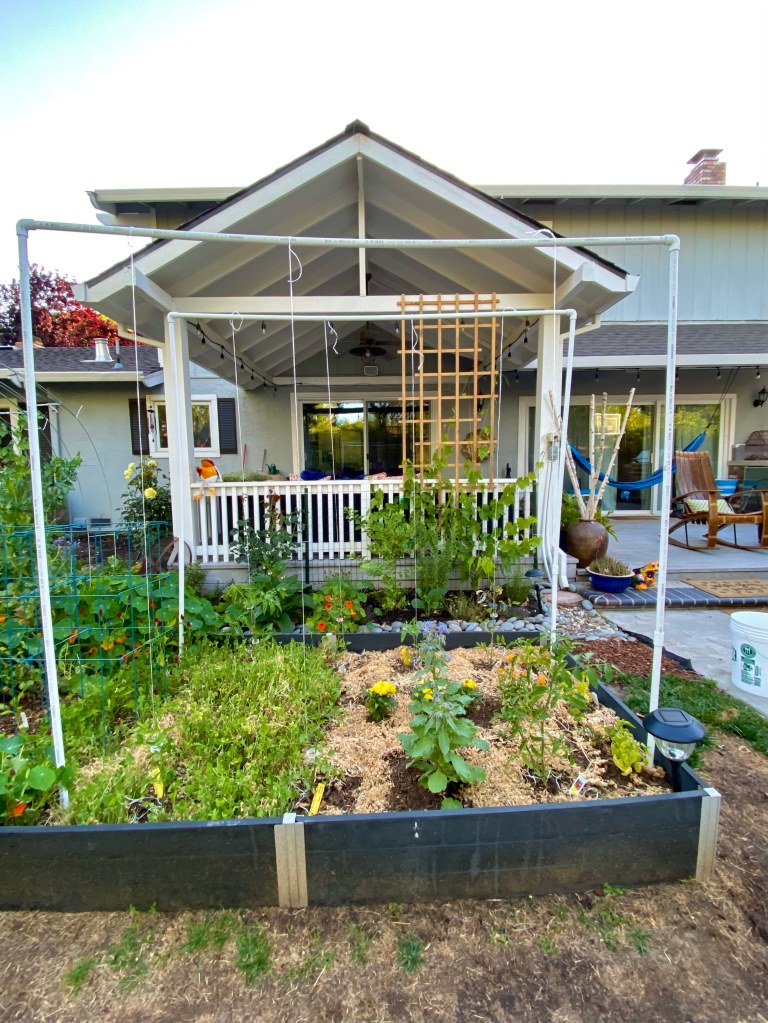
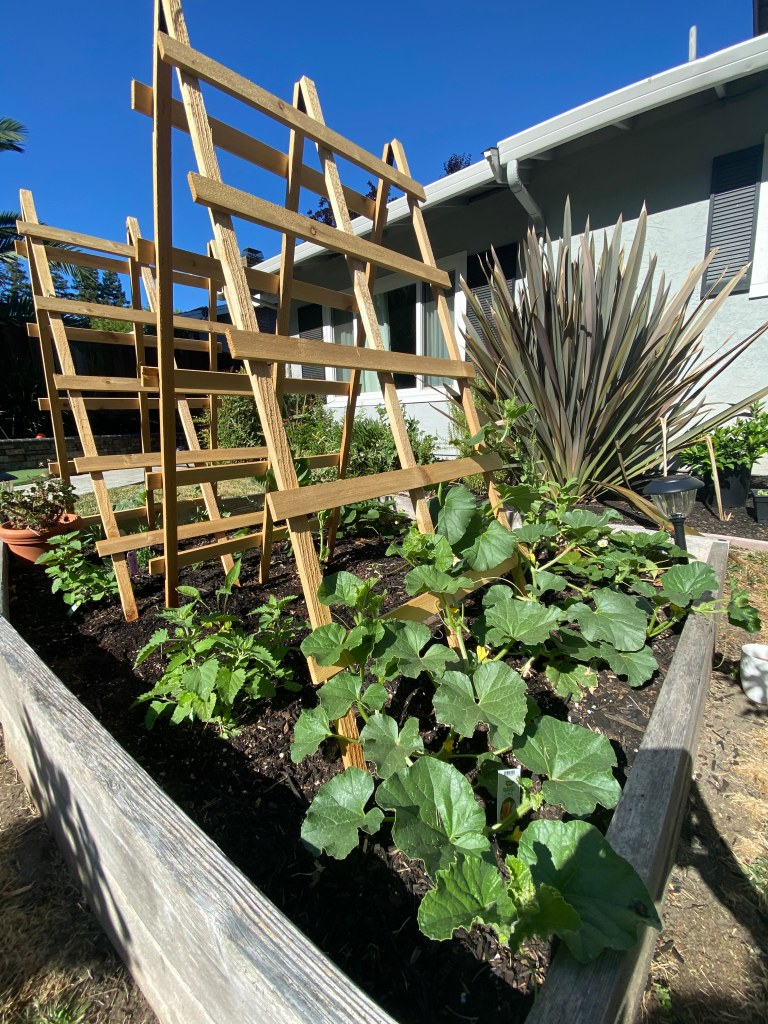
Here are a few examples of staking and trellising options. My favorite ones are the tomato trellis (first image) that we constructed out of PVC pipes and rebar, and my cattle panel tunnel for my winter squashes (last image).
Happy growing!
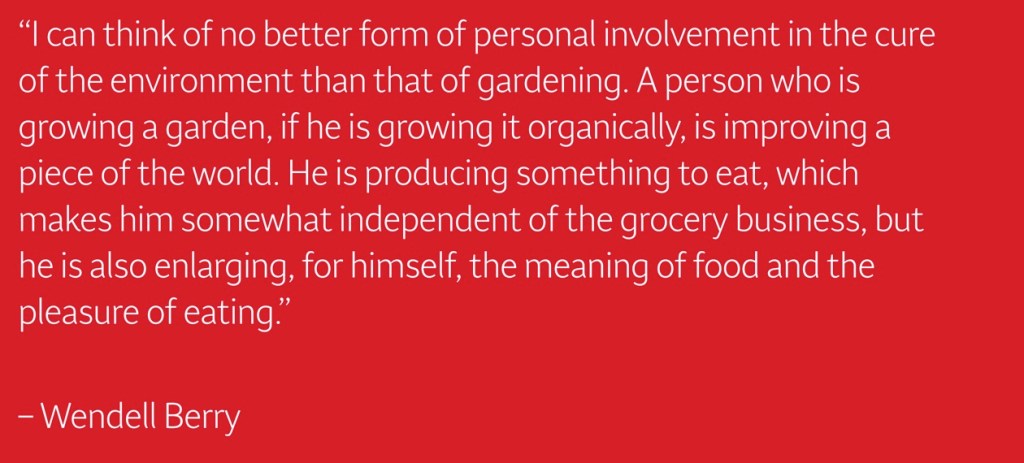
To close, I’d like to share this quote from Wendell Berry:
Thank you all very much for your time and interest. And I wish you all happy growing!

Thank you for Greener Gardening. It’s lovely 😊
LikeLike
A very informative, helpful post. Happy gardening.
LikeLike